How to Safely Remove Mats from Your Pet’s Fur at Home
I made every mistake you can make with a matted cat.
Grabbed scissors immediately. Cut too close. The cat moved. Nothing serious happened but it was close enough that my hands were shaking afterward.
The mat was gone. The trust took three weeks to rebuild.
If you have found a mat on your pet and your first instinct is to just cut it out – stop. Read this first. It takes ten minutes and it might save you from a very bad afternoon.
What a Mat Actually Is
A mat is not just a tangle.
It is a dense knot of dead fur, live fur, skin oils, dirt, and sometimes moisture all compressed together. The longer it sits, the tighter it gets. The tighter it gets, the closer it moves to the skin.
Once a mat is sitting against the skin, it pulls with every movement your pet makes – walking, stretching, turning their head. They feel it constantly. They just do not tell you.
Cats especially hide discomfort well. A cat with a painful mat might look completely normal from across the room. You only find out when you touch the area and they flinch – or when the vet finds it and gives you a look.
Mats also trap moisture and bacteria underneath. Left long enough, the skin underneath can become red, irritated, and infected. What starts as a grooming problem becomes a medical one.
The Tools You Need Before You Start
Do not attempt mat removal without the right tools. Improvising makes things worse.
Dematting comb – The most important tool in this process. Fewer, longer teeth specifically designed to work through dense knots without pulling the entire mat at once. Not the same as a regular comb. Worth buying specifically for this.
Wide-tooth comb – For working through the outer edges of a mat and checking progress as you go.
Detangling spray – Loosens the mat from the outside in. Makes the comb glide through instead of drag. Diluted conditioner or a small amount of coconut oil work too. The spray is just easier to apply precisely.
Rounded-tip scissors – For genuine emergencies only. The rounded tip reduces risk if your pet moves suddenly. Never use regular pointed scissors near a mat.
Treats – Not optional. The whole session depends on your pet staying calm. Treats are how you make that happen.
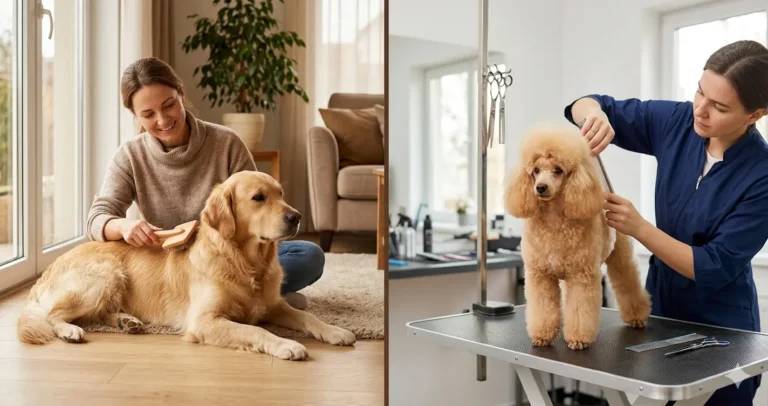
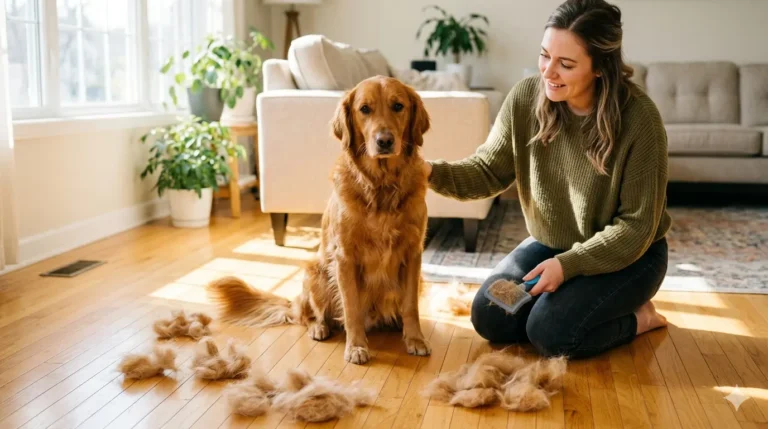
One thing to be clear about: the Purry Self-Cleaning Brush is not a mat removal tool. A slicker brush on a mat pulls on the skin and makes things worse. The Purry brush comes in at the very end – after the mat is fully gone – to smooth the coat and collect loose fur. That is its job in this process.
The Golden Rule of Mat Removal
Before anything else touches the mat – your hand goes to the base.
Pinch the fur firmly between the mat and the skin with your free hand. Hold it there for the entire time you are working on the mat.
This is the single most important technique. When you work on a mat without holding the base, every pull travels directly to the skin. Your pet feels all of it. They move. You lose control of the situation.
With the base held, your pet feels the pressure in your hand instead of at the skin. It is the difference between manageable and miserable. Every groomer learns this on day one. Most owners never hear about it.
Step-by-Step Mat Removal
Step 1 – Assess Before You Touch
Look at the mat before you do anything.
Is it fluffy and loose, or solid and dense? Is it sitting away from the skin or tight against it? Can you see where the mat ends and the skin begins?
A loose, early-stage mat is something you can handle at home. A solid, skin-tight mat is professional groomer territory. Know which one you are dealing with before you start.
Step 2 – Apply Detangling Spray
Spray the mat directly – not the surrounding fur, the mat itself.
Let it sit for two to three minutes. Do not rush this. The spray needs time to penetrate the knot and loosen the fibers from the inside. If you do not have detangling spray, apply a small amount of coconut oil with your fingers instead.
Step 3 – Hold the Base
Free hand at the base, holding the fur between the mat and the skin. Keep it there for the entire process. Non-negotiable.
Step 4 – Start at the Outer Edges
This is where most people go wrong. They go straight for the center of the mat – the densest, tightest part. Starting there just compresses everything further.
Start at the very outer edges. Use your fingers first to gently separate the outermost fibers. Then bring the dematting comb in at the edges, working in small sections. Short strokes. Gentle pressure. Outer edges first, slowly working inward.
Step 5 – Work in Sections and Take Breaks
Do not try to remove the entire mat in one go.
Work on one section, then stop. Let your pet relax for a moment. Give them a treat. Check how they are doing. If they are calm, continue. If they are stressed – genuinely stop and come back in an hour or the next day.
A mat removed over two calm sessions causes far less damage to your grooming relationship than one session that ends in panic.
Step 6 – Check Progress with the Wide-Tooth Comb
Every few minutes, run the wide-tooth comb through the area you have been working on.
If it moves through smoothly – good progress. If it snags – more work to do. This check prevents you from thinking you are done when there is still a knot underneath.
Step 7 – Finish with a Smooth-Out
Once the mat is fully gone and the wide-tooth comb moves through the area easily – this is when the Purry brush comes in.
Light strokes over the area to smooth the topcoat and collect any remaining loose fur. Press the button and the collected fur lifts off clean. That is the whole process.
Dogs vs Cats – Key Differences
The technique is the same. The patience required is different.
Removing Mats from Dogs
Most dogs are more tolerant of handling than cats – especially if they have been groomed regularly from puppyhood.
The areas most prone to matting on dogs are behind the ears, under the collar, the armpit area where the front legs meet the chest, and around the tail base. Long-haired breeds – Golden Retrievers, Cocker Spaniels, Shih Tzus, Afghan Hounds – mat faster and in more places.
If your dog has a double coat, the mat may have penetrated deeper than it looks on the surface. Part the fur down to the skin to check before you start. For very dense double coats during shedding season, an undercoat rake before the dematting comb helps loosen the overall structure first.
Removing Mats from Cats
Cats are harder. Not because the mats are different – because cats are cats.
A cat that decides it is done is done. You cannot negotiate with them.
Short sessions matter more with cats than with any other animal. If you get two minutes of calm cooperation, that is a win. Stop while it is still positive and come back tomorrow.
The belly and the area behind the hind legs are the two spots cats most reliably object to being touched. If the mat is in one of those areas, go especially slowly and have treats ready before you even start.
For cats that genuinely will not stay still, a professional groomer is the right answer. Some cats just need that level of handling.
When to Stop and Call a Professional
This is not the part to skip.
Stop immediately and call a groomer if the mat is rock solid with no give at all. Stop if you cannot see or feel where the mat ends and the skin begins. Stop if the skin underneath looks red, irritated, or broken.
Stop if your pet vocalizes when you touch the area – not just fidgets, but actually makes a sound. Stop if the mat is near the eyes, ears, groin, or directly on the spine. Stop if you have been working on it for more than fifteen minutes with no progress.
Professional groomers have tools specifically designed for severe mats and the training to use them safely near skin. Our guide on when to see a professional groomer vs doing it at home covers exactly which situations belong in professional hands and what to expect when you get there.
Sometimes Shaving Is the Right Answer
A full or partial shave sounds drastic. It is not.
If a coat has gotten severely matted – multiple large mats, mats close to the skin in several areas – a professional shave-down is often the kindest option. The fur grows back within a few months.
The lion cut for cats, where the body is shaved and the head and paws are left fuller, is a legitimate grooming choice. Many cats are visibly more comfortable afterward. If a Persian or Maine Coon owner gets a lion cut twice a year – they are not neglecting their cat. They are being practical.
After Mat Removal – Preventing the Next One
Removing a mat is the hard way. Preventing one is much easier.
Check these spots at every grooming session – behind the ears, under the armpits, around any collar, base of the tail, belly, behind the hind legs. A thirty-second check in each of these spots catches problems before they develop.
Consistency beats marathon sessions. Ten minutes three times a week prevents mats far more effectively than one long session once a month. Mats form in the gaps between grooming.
Finish every session with a smooth-out using the Purry brush as the final step. It catches loose fur that is about to become part of a mat, and the one-button cleanup means you will actually do it consistently.
Take the collar off during every grooming session and inspect the area underneath. Fur compresses against collar edges and mats faster than almost anywhere else.
A light mist of detangling spray before brushing during spring and fall makes the comb move through the coat much more easily. Our guide on long-haired cat grooming covers the full prevention routine for breeds that need the most consistent attention.
The Nutrition Connection
Pets with dry, brittle coats mat faster than pets with well-hydrated, healthy coats. The fur itself is more fragile – it breaks and knots more easily.
Omega-3 fatty acids are the biggest dietary factor for coat health. A fish oil supplement or fish-based food improves coat texture noticeably over six to eight weeks. Better coat texture means less matting over time.
Our article on the best foods to reduce pet shedding covers which specific nutrients actually move the needle on coat quality – and what to look for on a food label.
Warning Signs to Watch During Mat Removal
You are close to the skin during this process. Pay attention to what you are seeing.
Red or broken skin underneath means stop. This area may already be infected and needs a vet appointment, not more grooming. Dark specks near the skin could be flea dirt – small dots that turn reddish-brown on a damp paper towel confirm it.
A smell from the mat area suggests a bacterial or yeast infection underneath. Again – vet, not grooming. A consistent pain response in one specific location is a reason to get it checked, not pushed through.
These signs do not mean panic. They mean information. Act on them.
FAQ: How to Remove Mats from Pet Fur
Can I use coconut oil to remove a mat?
Yes – apply a small amount directly to the mat, let it sit for a few minutes, then work through with a dematting comb starting from the outer edges. It loosens the knot without irritating the skin.
Is it safe to cut a mat out with scissors at home?
Sometimes – but only with rounded-tip scissors, only if you can clearly see where the mat ends and the skin begins, and only if the mat is not close to the skin. When in doubt, do not. The risk of cutting skin on a pet that moves suddenly is real.
My cat will not let me touch the mat at all. What do I do?
Call a professional groomer. Some cats need a level of handling that is not possible at home. A groomer can also assess whether sedation is appropriate for severe cases – that is a vet decision, not a grooming one.
How long does mat removal take?
A small, early-stage mat takes five to ten minutes with the right tools. A large, dense mat may need multiple sessions over a few days. Never rush it.
Will the fur grow back normally after a mat is removed?
Yes – assuming the skin underneath was not damaged. The coat grows back normally. If the skin was irritated or infected, recovery takes longer and may need veterinary treatment first.
Can I use the Purry Self-Cleaning Brush to remove a mat?
No. The Purry brush is a finishing tool – it smooths the coat and collects loose fur after grooming. Using a slicker brush on a mat pulls on the skin and makes things worse. Always use a dematting comb first. The Purry brush comes in at the very end when the coat is tangle-free.
How do I stop mats from coming back?
Consistent grooming – specifically short sessions three to four times a week rather than one long session occasionally. Regular checks on the six spots where mats form first. Detangling spray during shedding season. Good diet for coat health.
The Trust Took Three Weeks
Finding a mat is not a grooming failure. It happens to careful owners too.
What matters is handling it correctly. Hold the base. Start at the edges. Take breaks. Stop if your pet is distressed. Call a professional when the mat is beyond what home tools can safely handle.
The cat whose trust took three weeks to rebuild after my scissors incident is fine now. Great, actually. She comes to grooming sessions voluntarily these days. It just took earning it back properly.